How to Design a Wood Flitch Beam
A wood flitch beam is a composite beam containing some amount of steel (usually steel plates) to increase its strength. Flitch beams are typically built from a combination of visually graded lumber and a steel plate. The most common configuration for this type of beam is to sandwich a long, narrow steel plate between two or more pieces of lumber. Adding steel to a wood beam can significantly increase its bending and shear capacity. While flitch beams are becoming less common due to widespread availablity of engineered wood and other materials, there are still a few cases where reinforced visually graded lumber makes sense, including: asthetics, cost, availablility and servicability (reinforcing existing beams).
Regardless, flitch beam analysis and design is not that difficult. The key to this type of analysis is to transform the steel plate properties to equivalent wood properties, as shown in the image below.

3pedals, CC BY-SA 4.0, via Wikimedia Commons
Much like other materials and shapes, flitch beams can be designed in just a few steps.
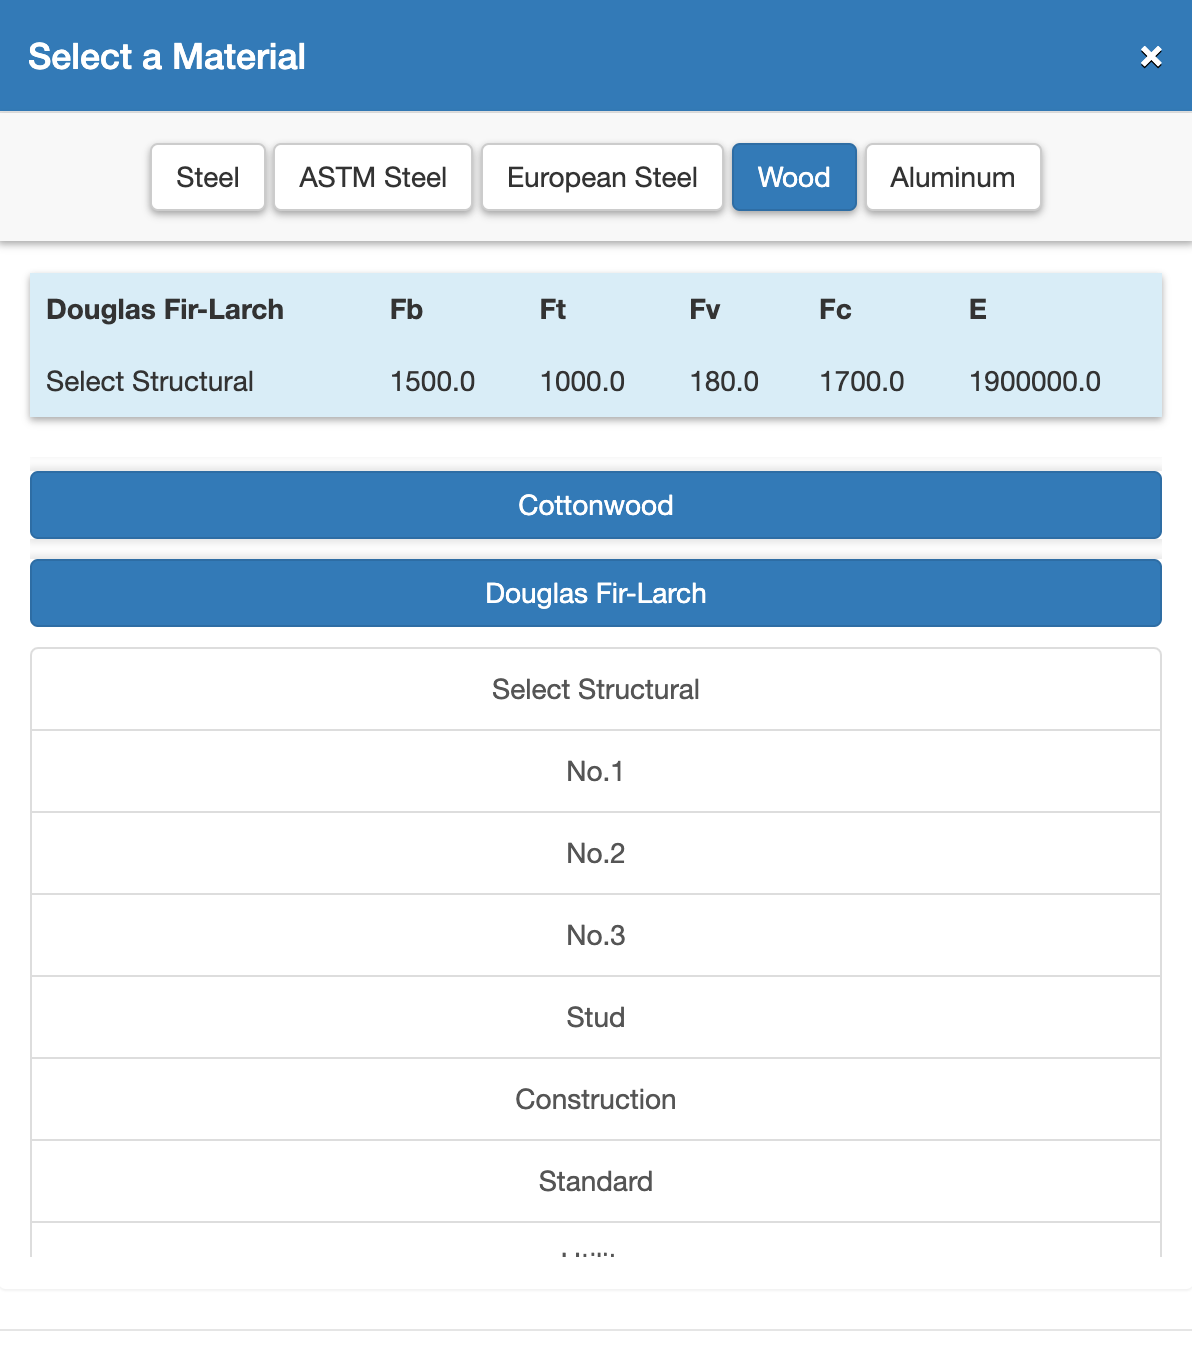
- Choose a Material - Choose the appropriate wood species beam you will be designing.
- Select a Size - Select the size of the visually graded luber you would like to design.
- Determine Plies - Select the number of plies you'd like to use (typically 2 for flitch beams).
- Add the Steel - Add the steel plate cross-section to the lumber cross-section.
- Add Spans and Supports - Enter the distance(s) you are trying to span.
- Add Loads - Enter loads based on their type and load case.
- Select a Design Method - In the United States, the Nation Design Specification (NDS) from the American Wood Council (AWC) is common.
- Analyze and apply design check to your beam.
In this tutorial we'll use WebStructural to work our way through each of these steps. When we're done, we'll end up with a simply supported flitch beam supporting a distributed load. WebStructural will help us determine the right size lumber and steel to safely handle bending demand, shear demand and deflection limits.
Let's get started
For this example, we'll assume the following:
- Our flitch beam spans 11 feet and supports 2x8s at 16" spanning 11 feet on each side.
- The maximum depth of the beam is 7 ¼".
- The total load is 40 psf dead load and 10 psf live load.
- Lumber is Douglas Fir-Larch, Select Structural.
Choose a Material
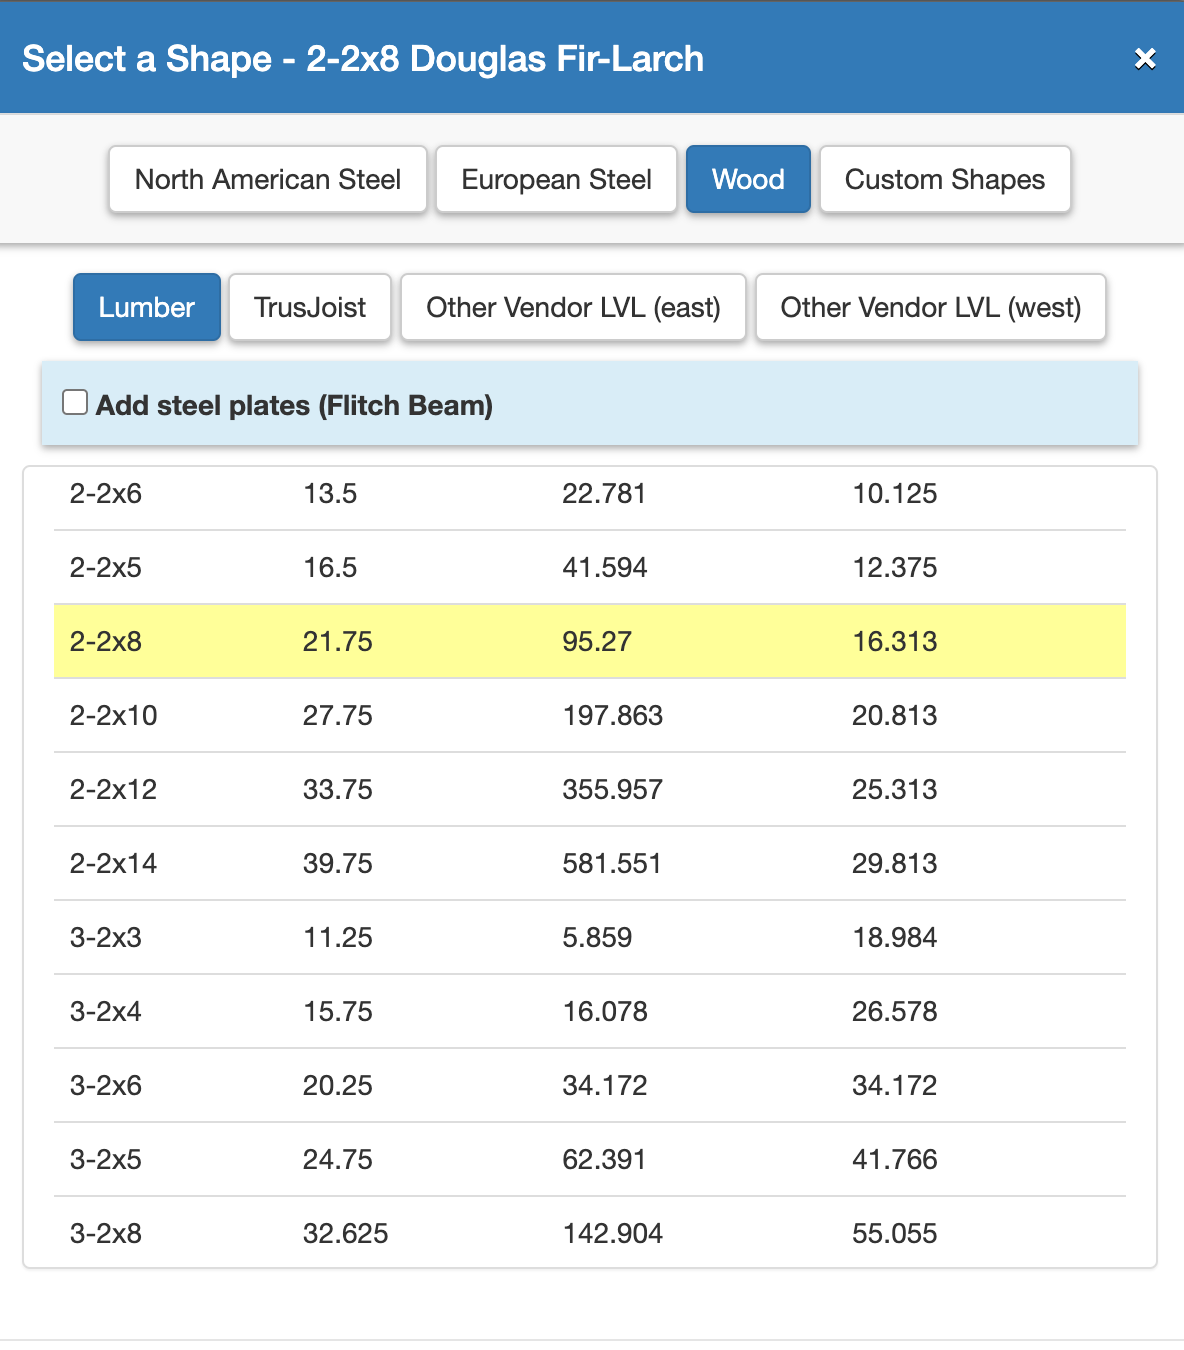
Select and Configure a Shape
Next, let's select our shape. Our requiements state that the maximum depth cannot exceed 7 ¼", which happens to be the depth of a standard 2X8. This is the size we'll start with.
Next, we need to add our steel plate. Your exact configuration can vary but a very common layout for flitch beams is to sandwich a single steel plate between two pieces of lumber. The configuration doesn't matter too much, but a symmetric cross-section is preferrable.
- Plate thickness = 0.375
- Plate height = 7.25
- Number of plates = 1
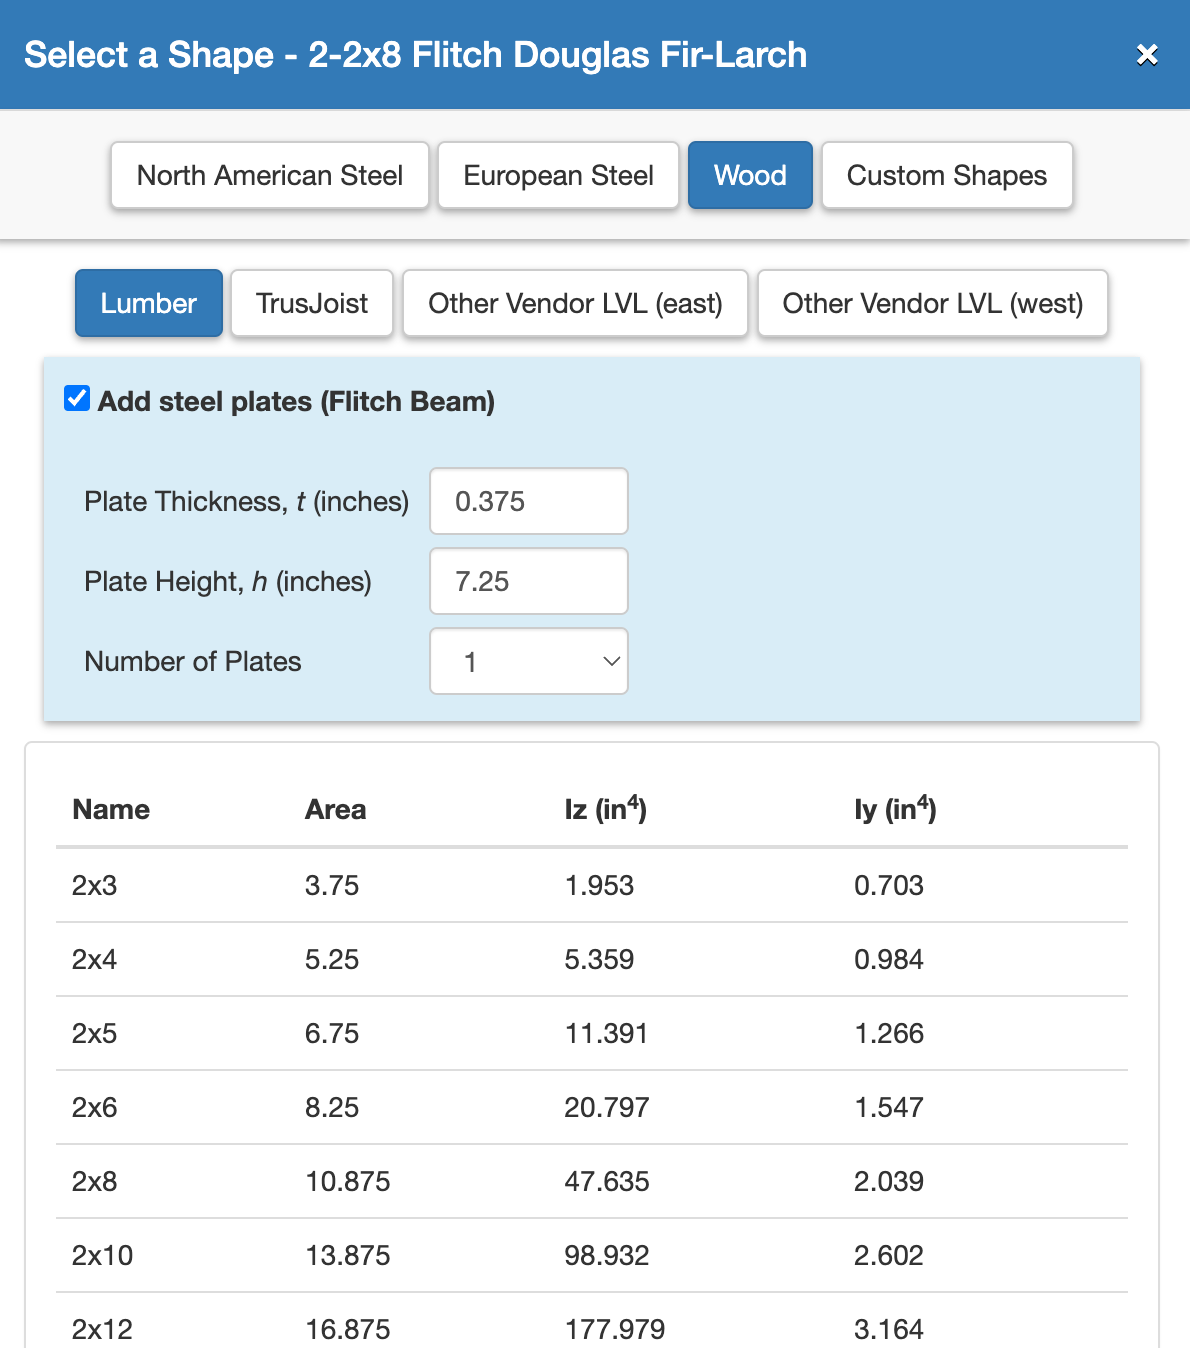
When the "Add steel plates (flitch beam)" is checked, WebStructural will automatically transform the steel shape properties to equivalent wood properties. The software does this by first calculating a transformation factor based on the elastic or Young's modulus of each material:
n = Esteel/Ewood
This factor is multiplied by the shape properties for the steel plate (Ix, Sx and A). These transformed shape properties are added to the wood properties giving us our total composite shape properties. The total composite shape properties will be used for our final designs.
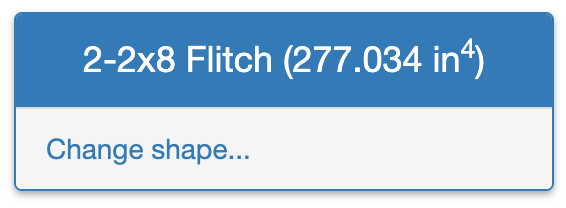
You can verify the steel properties are being included by looking at the Change shape... button title. Note that it says 2-2x8 Flitch (277.034 in4) (the number in parenthesis is the transformed moment of inertia about the strong axis).
Add Spans and Supports
Our beam will span 11 feet. As is common for many wood beams, it will be simply supported on both ends. To add or edit span lengths in WebStructural, simply click Add or remove spans... button or click the span dimension on the drawing. You can add a span to the left or right of existing spans, or you can delete a span by clicking Remove button for a specific span.
For our example we only need one 11 foot span.
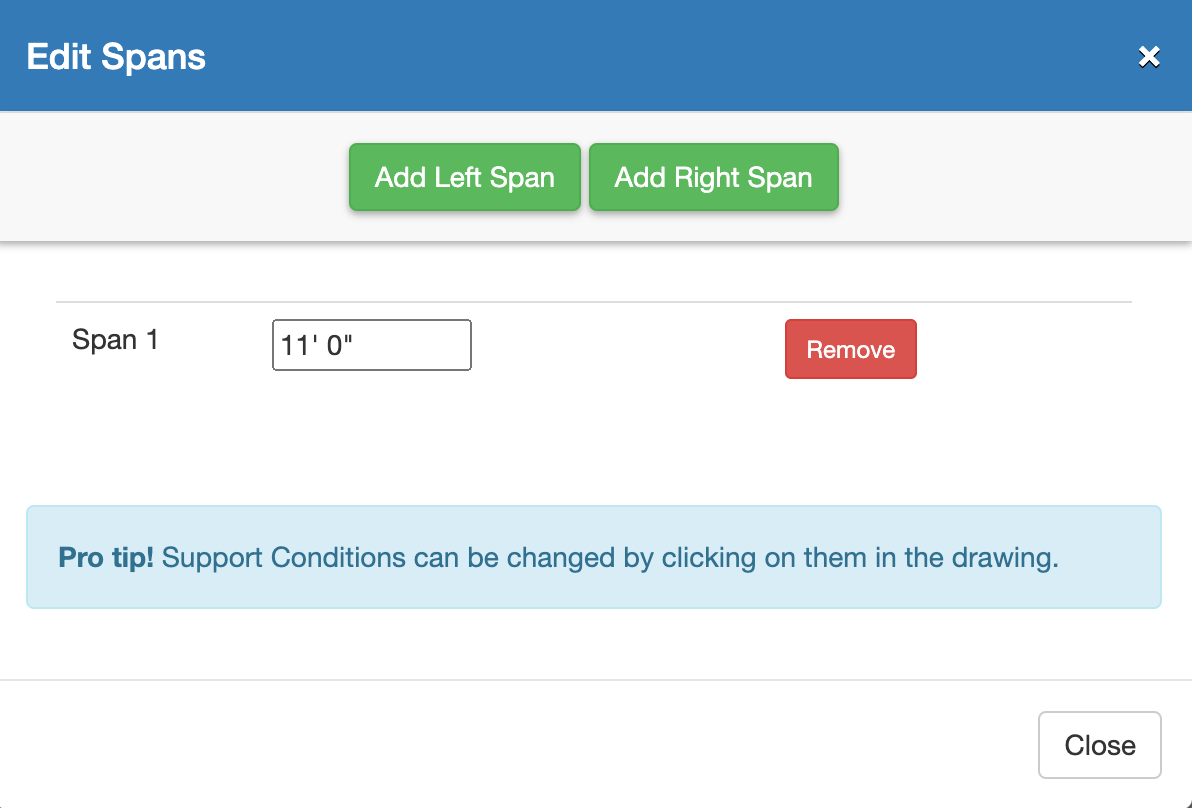
Beam support conditions can be changed in WebStructural by simply clicking on a support (the gray triangle under the beam). Clicking a support will toggle through three support types (support conditions): Pinned, Fixed, or Free.
Configure Bracing
As is common for many wood beam designs, and because we have lumber framing into our supporting beam, we'll assume the beam is continuously braced. You can always change this to custom or equally spaced braces if you need finer control over your bracing configuration.
Add Loads
WebStructural supports most of the common load cases and load types for wood beam design. If you want more information about load cases and load types, see our Steel Beam How To tutorial.
For our example, the requirements state that we need to support 40 psf dead load and 15 psf live load. We will convert this to a uniform linear load that will be applied directly to our beam:
- Dead Load = 40 lbs/ft2 × 11 ft = 440 lbs/ft
- Live Load = 10 lbs/ft2 × 11 ft = 110 lbs/ft
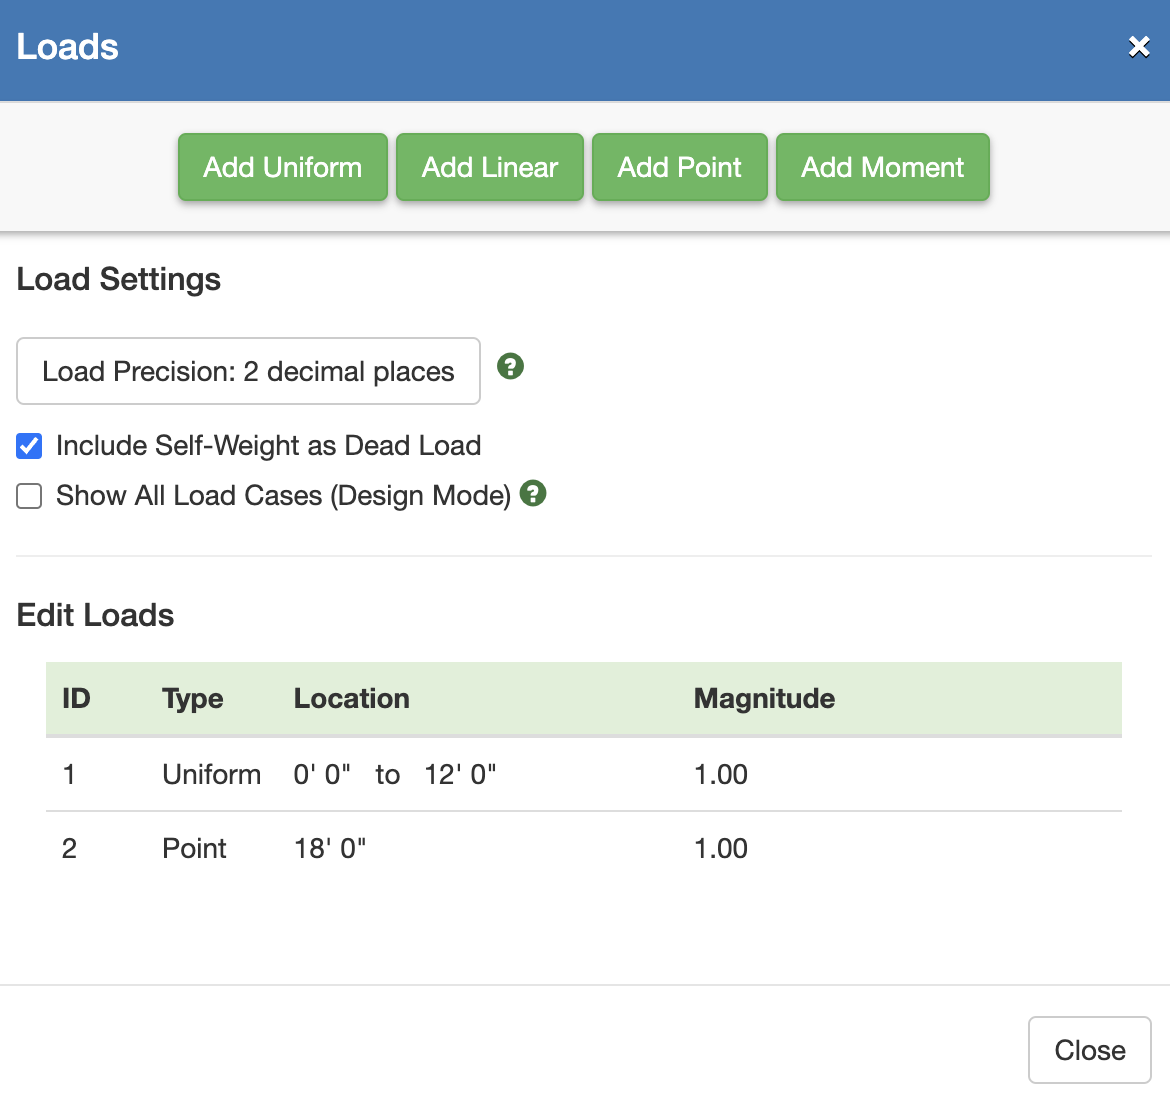

Now click on the row that says "Uniform Load". This will launch a dialog to edit that load. Click the button that says "Left End" to ensure the load spans the entire length of the beam. Next, check the box that says "Show All Load Cases (design mode)". In the input box labeled "D" enter 0.40 and in the input box labeled "L" enter 0.11

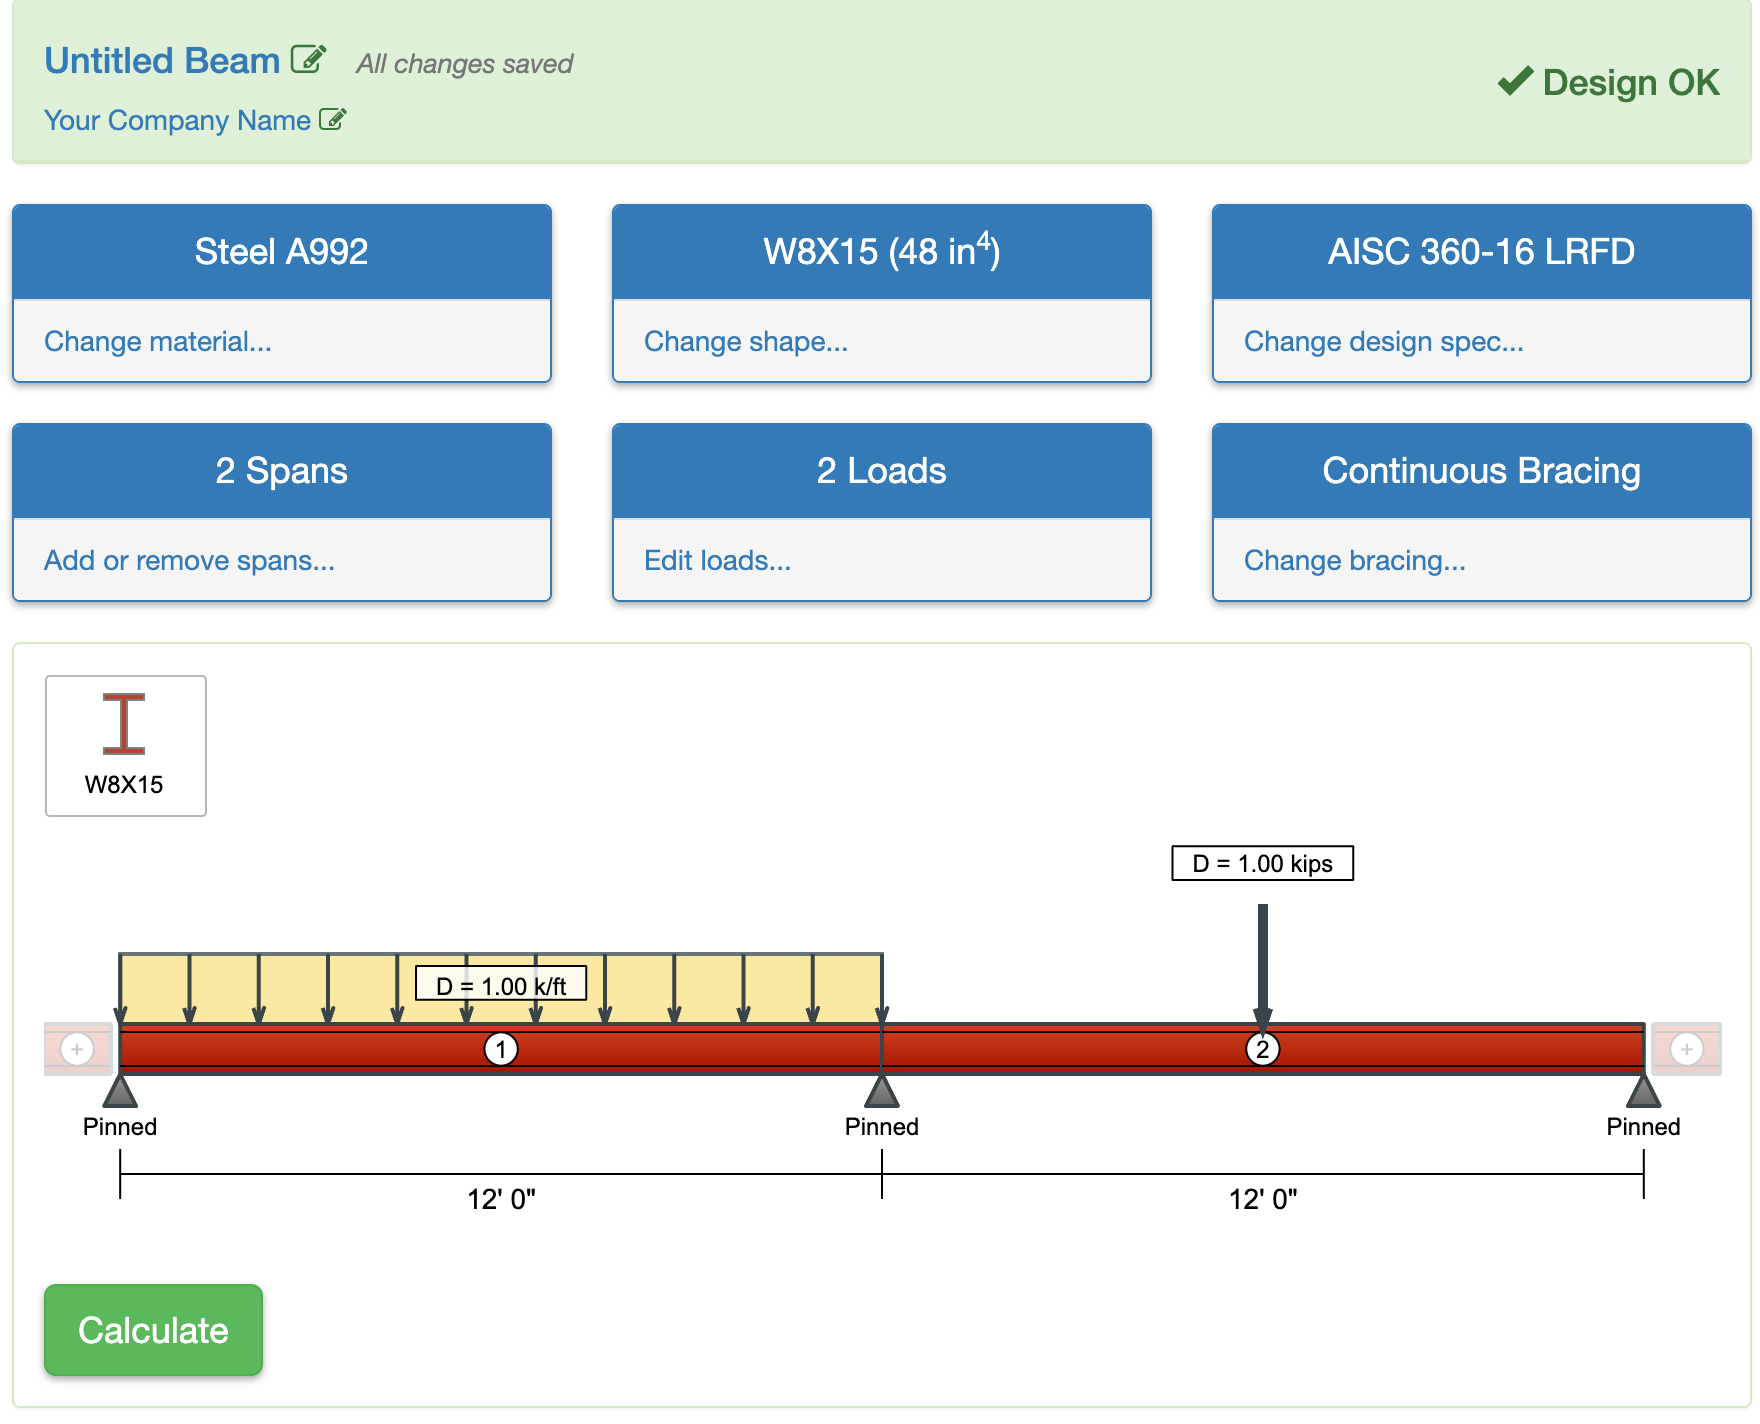
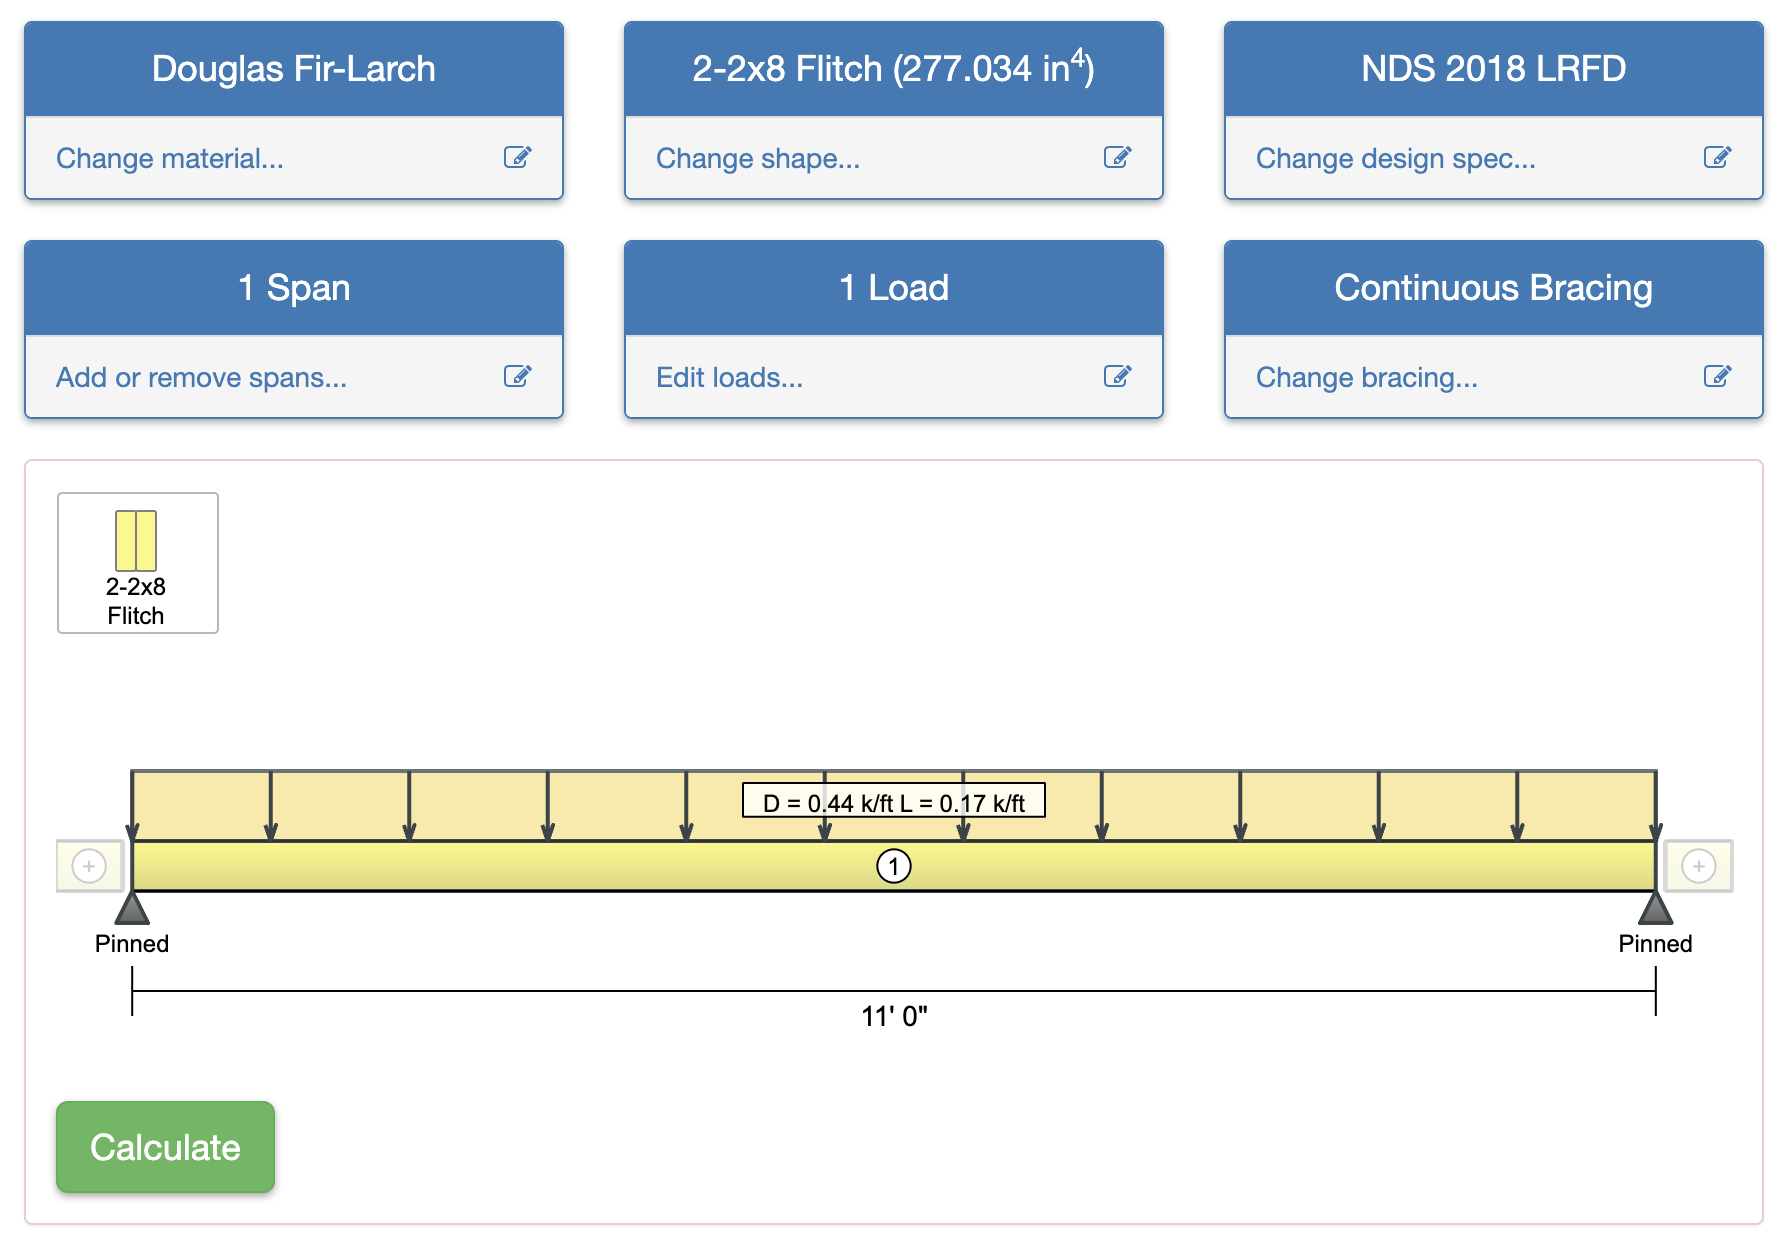
Your model should now look like this:
Select a Design Method
When you choose a wood shape, WebStructural automatically switches the design specification to NDS. You may change load combinations from LRFD to ASD or override the design specification altogether if you'd prefer basic capacity checks. In general, we recommend using NDS design specifications for your wood designs. This is what we'll use for this example.
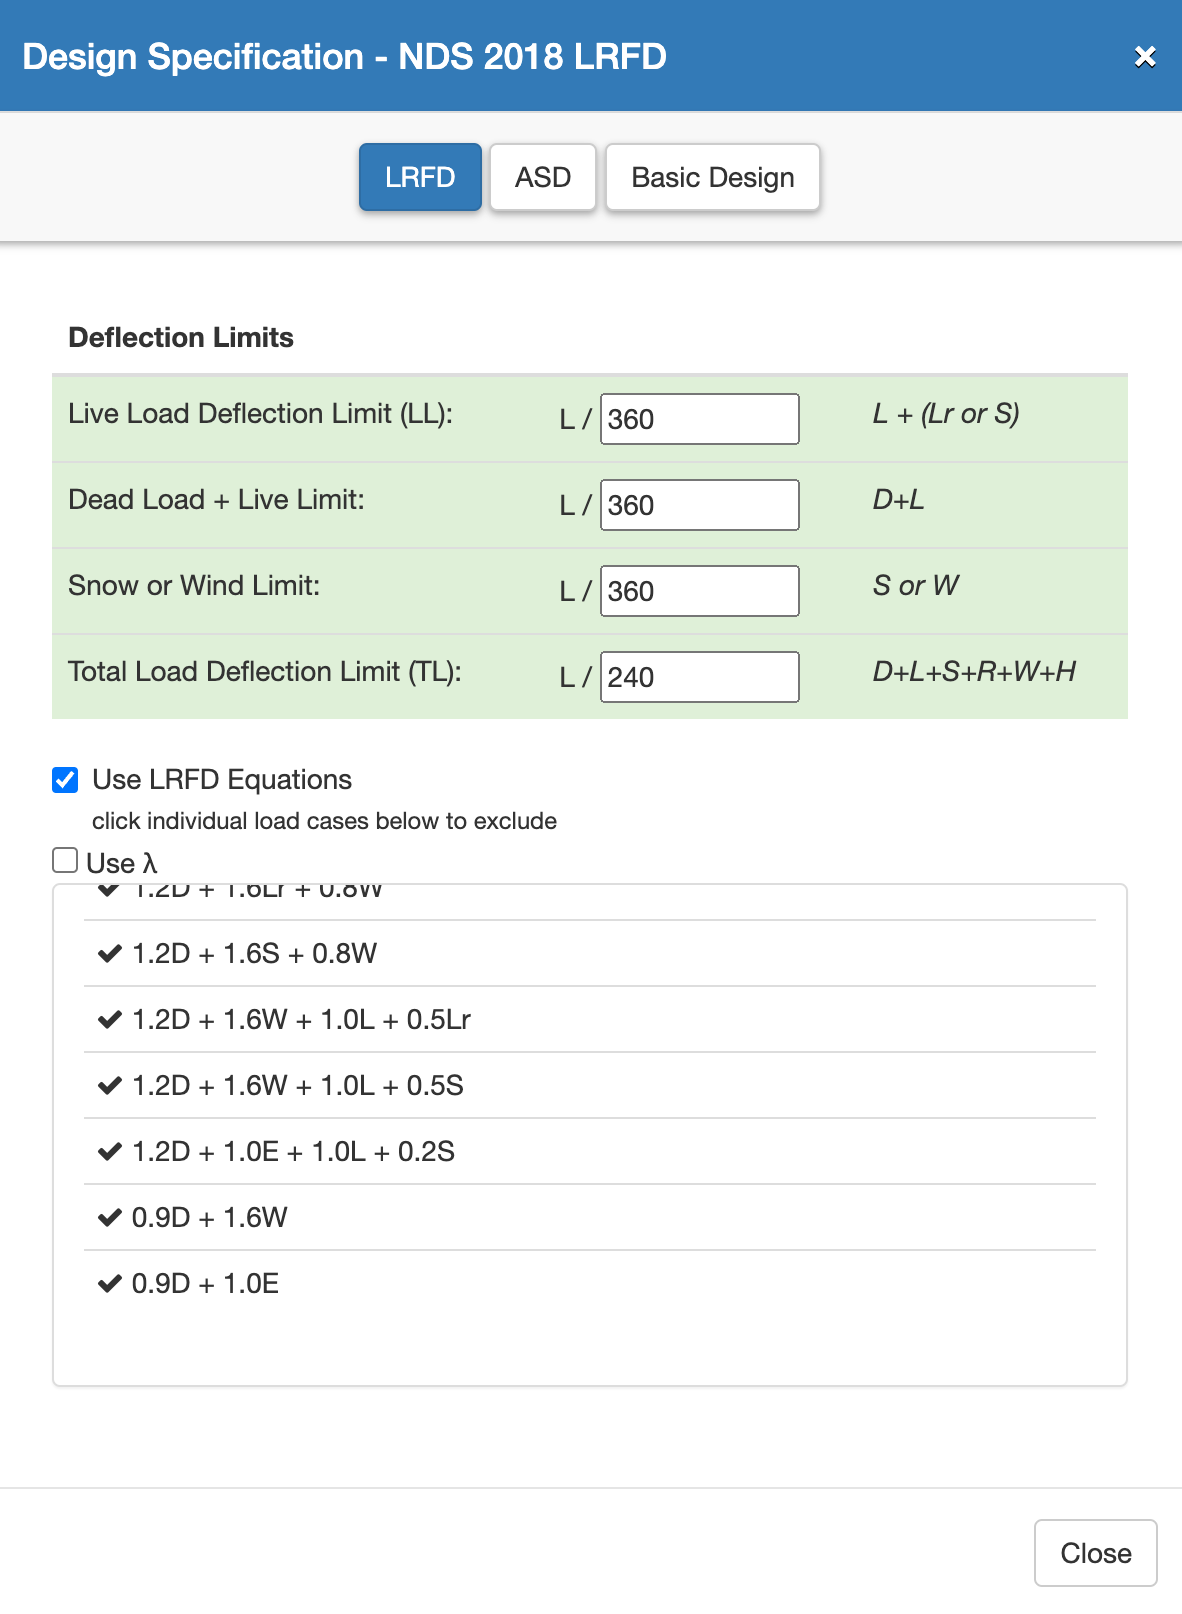
Design Equations
WebStructural will automatically factor your loads and apply them in the appropriate design equations. You can view these equation and exclude ones you don't want to include in analysis if you wish.
Finishing Touches: Analyze, Design and Report
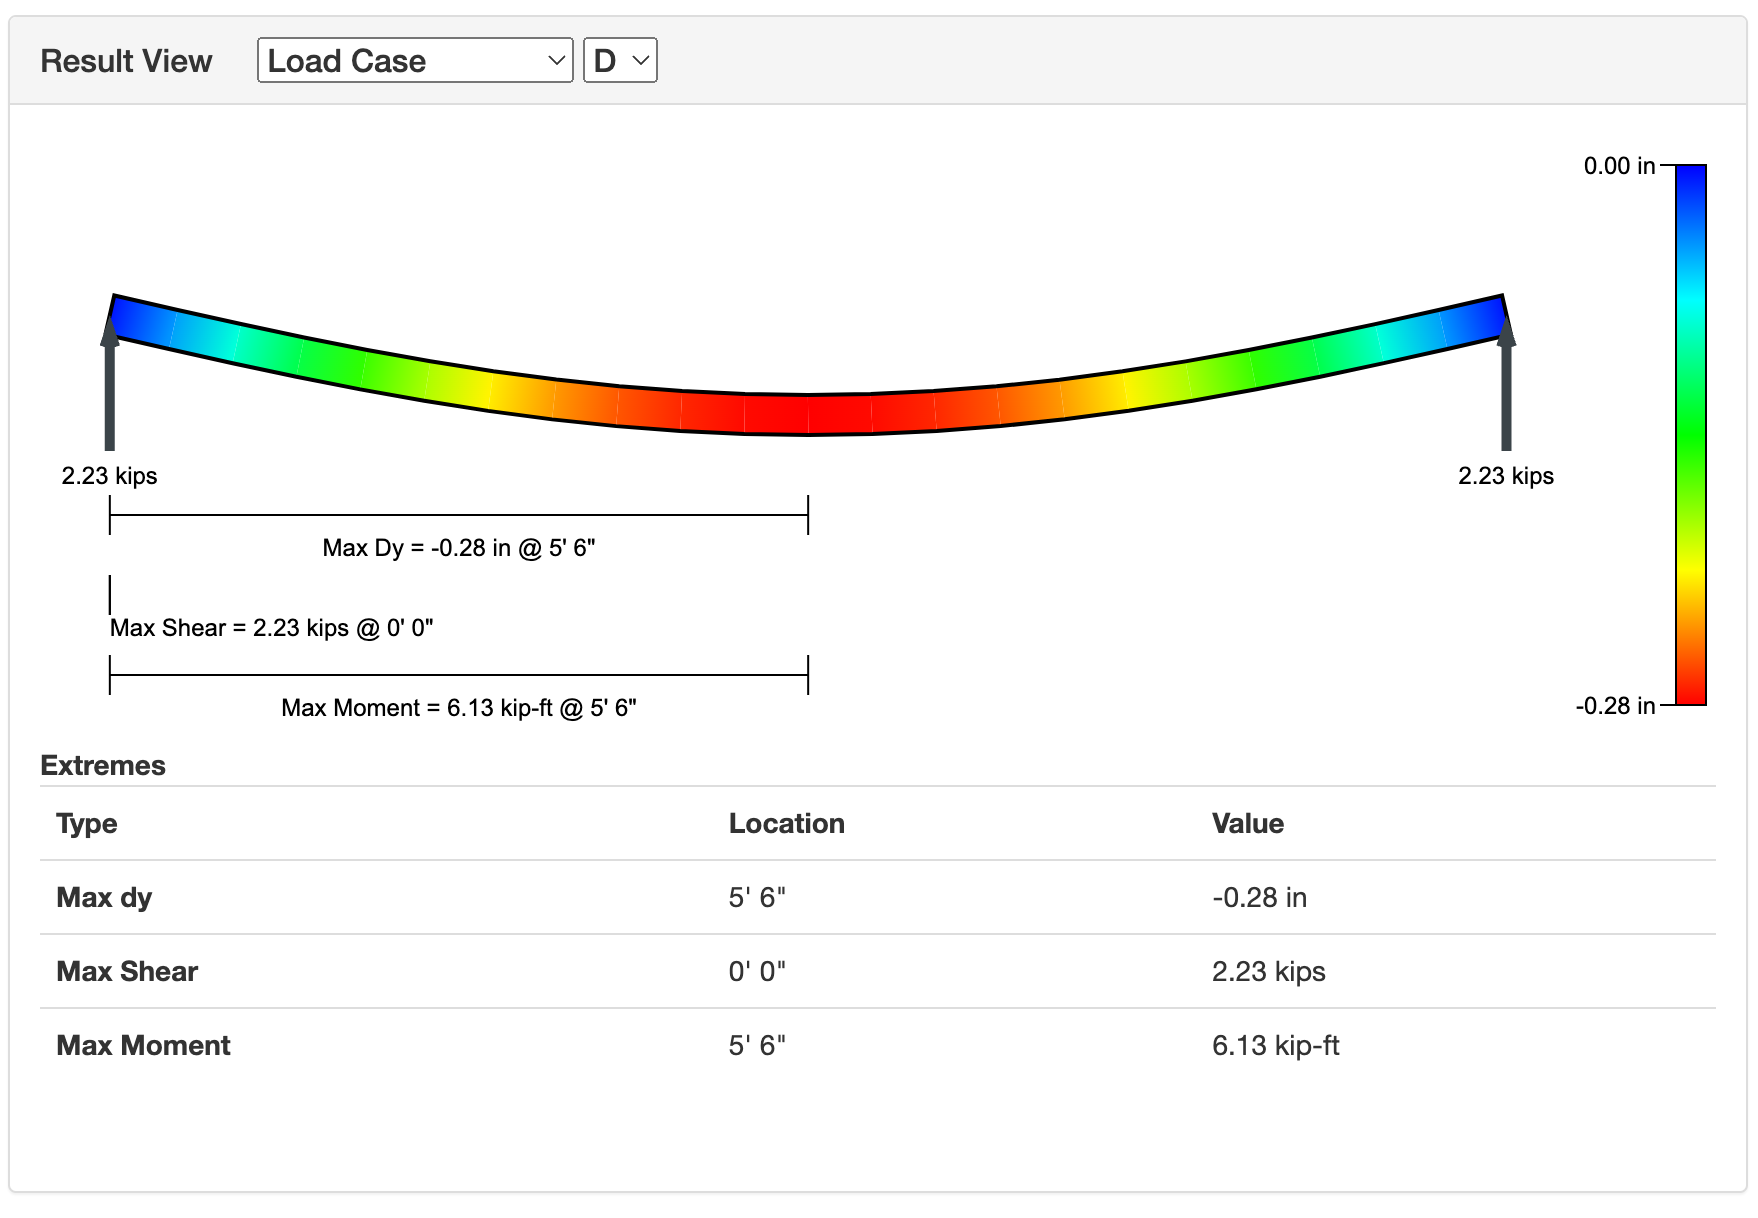
Now all that is left to do is analyze our beam and review the results. Once you have input all of your criteria, simply click that big green Calculate button. WebStructural will perform a finite element analysis for the beam model, including the contribution from the steel plate. If you did everything right, you should see a lot of green. That's good, it means the bending, shear, and deflection capacity ratios are less than 1.0.
If you entered everything correctly, your design should look like this
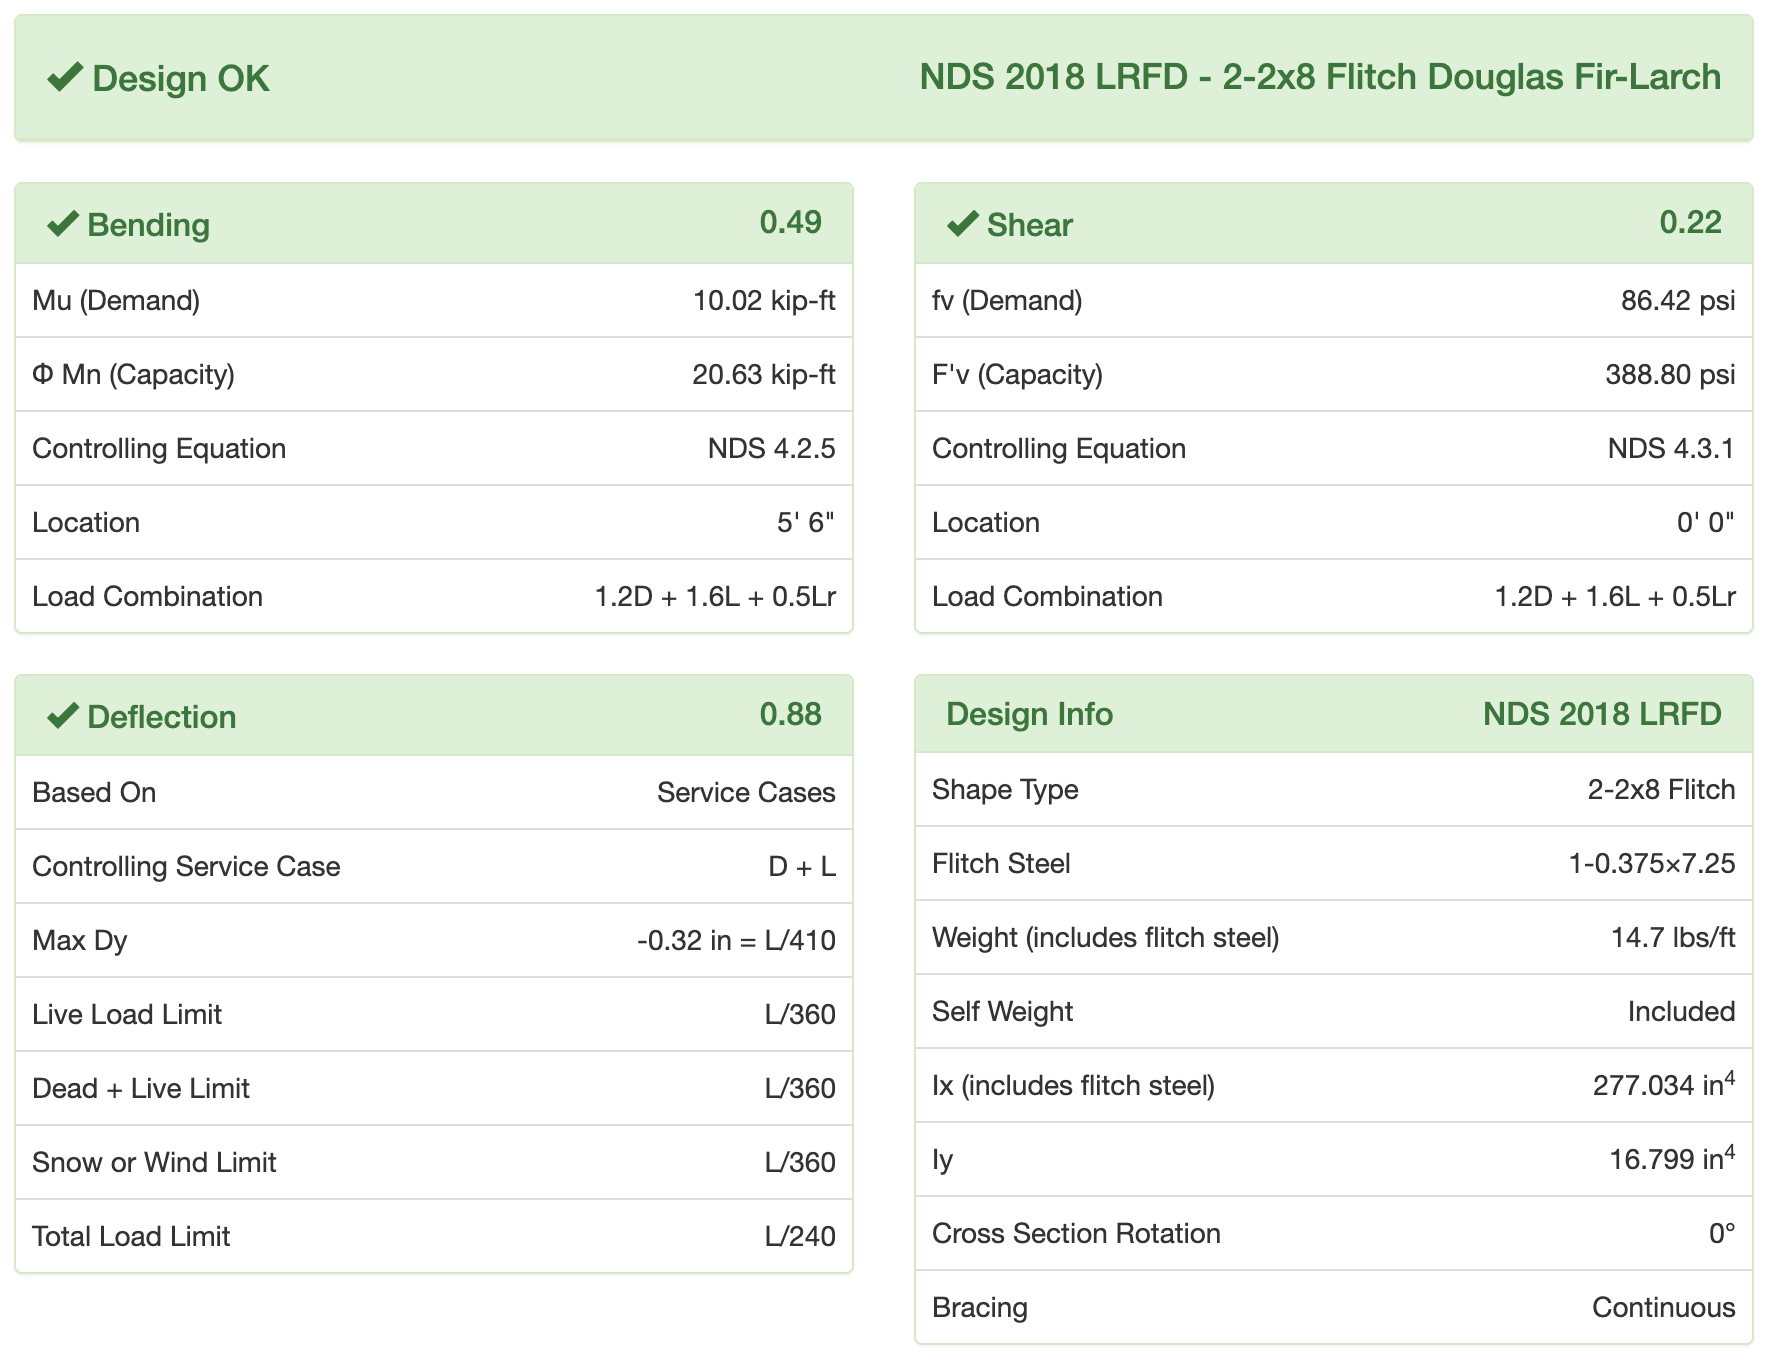
And that's it! Wood Flitch Beam Design in just a few clicks.
If your report is red, the capacity ratios are greater than 1.0 and the beam does not meet our design criteria. This means you need a bigger wood shape, more plies or more steel. For example, you could modify the steel thickness, change the number of steel plates, or change the number of 2x8s to get a larger moment of inertia. Then, simply click the Calculate button again.
Ready to design your next flitch wood beam in minutes?
Try WebStructural NowAt WebStructural we strive to give you high quality design calculations with transparent reports that you can rely on. If you found this how-to useful please share it with your colleagues.
We want to hear from you. Please let us know if you have any suggestions or requests.